Premanufactured laminate countertops are easy to install
Q: We are remodeling our bathroom and would like to install a new countertop on our vanity. We are buying a new drop-in sink and would like to buy a laminate countertop to go with it. We need a simple rectangular top with no cuts for a small vanity. We have seen these in home centers and were wondering how difficult it would be to install.
A: Premanufactured laminate countertops are the least expensive and the easiest to install. Home centers stock a decent supply of 4, 6, and 8 footers, but you can also special order countertops, which means you won’t have to cut them.
If you do custom order a top, you will need to bring in the measurements of your vanity. Order the top with an inch overhang for the exposed edge.
You will need to cut a hole in the top for the sink. Turn the countertop over so that the underside is facing up. The sink will usually come with a template for you to trace around.
If your sink does not come with a template, turn the sink over and trace the outline of it onto the surface. The manufacturer will tell you how far inside the line to cut.
With the countertop still upside down, drill a hole near the inside of your outline and grab a jigsaw. Place the jigsaw blade into the hole and carefully saw out the piece where the sink will go. Support the piece you are cutting out, or else as you get near the end of the cut, it may fall out and chip the laminate.
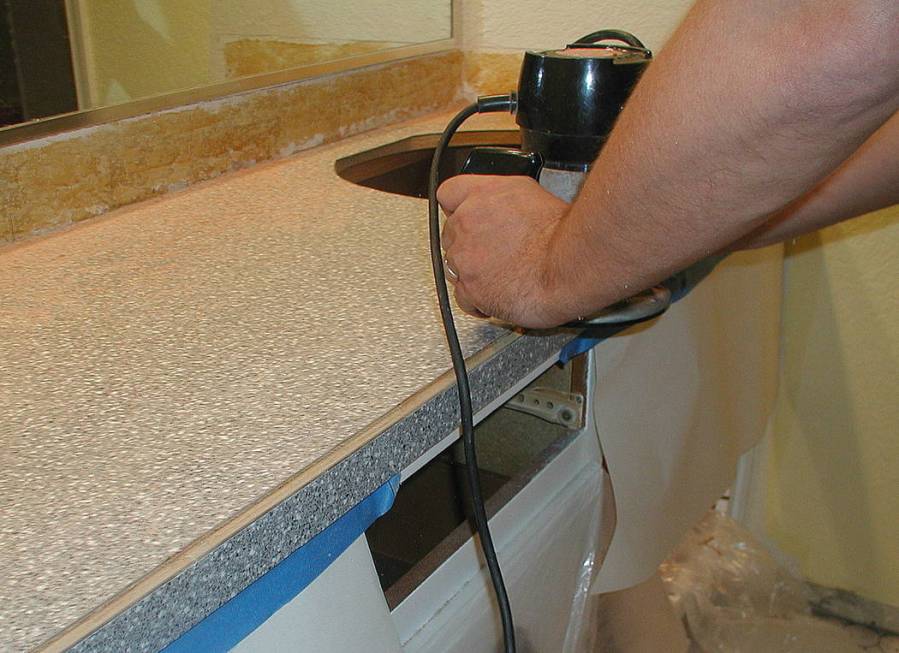
If you buy an in-stock top and have to cut it to fit your vanity, use a framing square and mark a cutting line on the bottom of the countertop. Again, use the jigsaw with the countertop upside down. You can clamp a straightedge to the top for a steady cut. Then smooth the edge with a sander to remove any burrs.
The countertop has built-up edges to give it extra strength and a more solid appearance. So if you cut the top, you have to replace the built-up area and laminate it. You can buy a kit that includes the stock (usually a strip of particle board) to build up the edge, as well as a piece of laminate to cover both the top and the backsplash.
Glue the stock to the underside of the top so that it aligns with the edge. Screw it together with a couple of small wood screws (just don’t use screws that are so long they poke through the laminate or bubble it). You can sand out any ridges to get a nice, smooth edge.
Break out your clothes iron and set it to the medium heat setting (no steam, please). Line up the laminate on the edge and hold the iron against it. The heat will activate the adhesive on the back of the laminate and make it stick like stink on a skunk. You can use a file to shave off any edges of the laminate.
Set the countertop on your vanity and level it from side to side and front to back. Slide shims under the countertop if necessary.
From the inside of your vanity, secure the countertop by screwing it to the corner blocks of your vanity. Again, use screws that won’t be so long they damage the laminate. You also can lay a bead of construction adhesive on your vanity before you set the top down and screw it all together, but if you ever want to replace the top again, you may damage the vanity in the process.
Your backsplash and counter will likely rest against drywall, so you shouldn’t have to scribe the profile of the wall into your new top. As the last step, lay a bead of silicone bath caulk where the countertop meets the wall. Then just secure the sink and hook up the plumbing.
Mike Klimek is a licensed contractor and owner of Las Vegas Handyman. Questions may be sent by email to handymanoflasvegas@msn.com. Or mail to 4710 W. Dewey Drive, No. 100, Las Vegas, NV 89118. His web address is www.handymanoflasvegas.com.