Replacing damaged mailbox requires post hole digger

Q: I have an older ranch-style house on a big lot, and one of the neighbors clipped my mailbox. Now I get to spend my Saturday replacing it. Can you please tell me how?
A: It sounds like you might benefit from a Neighborhood Watch program.
You can buy a variety of mailboxes but, for the most part, they are all going to be installed in the same manner. You can get a generic mailbox or you can get a cutesy one that looks like a tractor or an airplane.
Regardless of which style you buy, they will all sit on top of a post that will be embedded in concrete in the ground. For the post, you will use a 4-by-4-inch pressure-treated post. You can also use a metal tube as a post and attach it using concrete anchors.
The bottom of the mailbox should be 42 inches off the ground, and it should stand 2 feet back from the street (if you haven’t received a notice from the post office, then the current distance from the street is probably fine). This will allow the postal carrier to be able to deliver your mortgage statements and credit card bills without getting out of his vehicle.
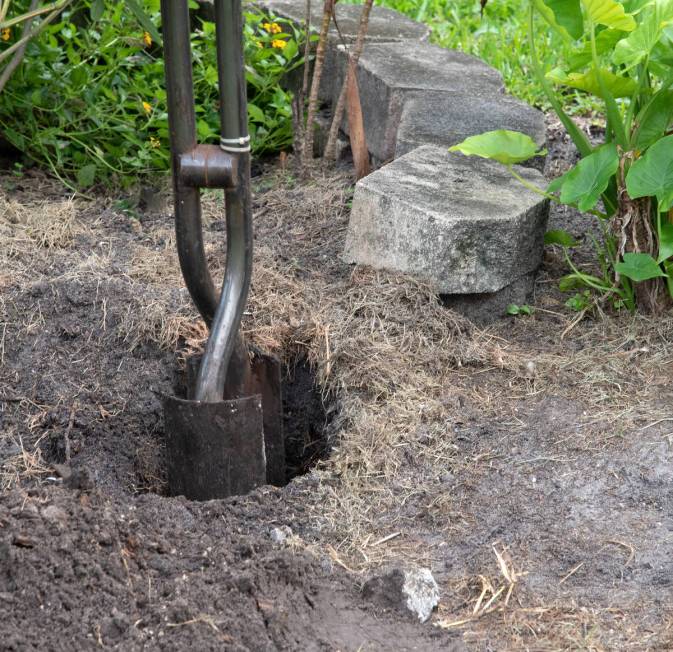
The real fun begins when you get to dig a hole for the post. You’ll need a post hole digger, which makes the sides of the hole vertical and narrow, while the bottom of the hole will be reasonably flat. A post hole digger has two handles and is hinged near the bottom. It also has a small shovel attached to the bottom of each handle.
To use the tool, you hold the handles together, thrust the tool into the ground and spread your hands apart. This will pinch the dirt between the two small shovels and allow you to remove it.
Repeat this until your hands are just about ready to fall off of your arms. You can use a 5-gallon bucket as a guide for the size of the hole. The hole should be just big enough to fit the bucket. Once the hole is at the right depth, it’s time to add the post and concrete.
Throw some rocks into the bottom of the hole to help keep moisture away from the open grain on the end of the post. The post must be plumb, so stick it in the hole and add a few rocks to hold it in place.
Hold a level against the sides of the post and move it until it is plumb. When you have the post where you want it, you can add the concrete.
You can buy premixed concrete in a bag and all you have to do is add water. Who knew that mixing concrete would be as easy as baking a cake?
Mix the concrete according to the manufacturer’s instructions and add it to the hole. Use a stick and jab down into the mixture to remove the air pockets.
Check to see that the post is still plumb; you may want to lay a 2-by-4 across the opening to act as a brace and secure it to the post until the concrete hardens. This will keep the post from shifting. It’s also a good idea to have a gentle slope from the post to the perimeter of the concrete so that any water will run away from the post.
After the concrete is hard, remove the brace and you can fill in around the post with landscape rock.
Now, it’s a simple matter of attaching the mailbox to the post. The manufacturer will supply you with the necessary hardware for this, and it usually consists of a bracket that attaches to the post and the mailbox.
You also can add stick-on numbers to correspond to your house. In your case, you may want to add fluorescent orange paint and reflective stickers so your neighbor doesn’t hit your mailbox again.
Mike Klimek is a licensed contractor and owner of Las Vegas Handyman. Questions may be sent by email to handymanoflasvegas@msn.com. Or, mail to 4710 W. Dewey Drive, No. 100, Las Vegas, NV 89118. His web address is www.handymanoflasvegas.com.