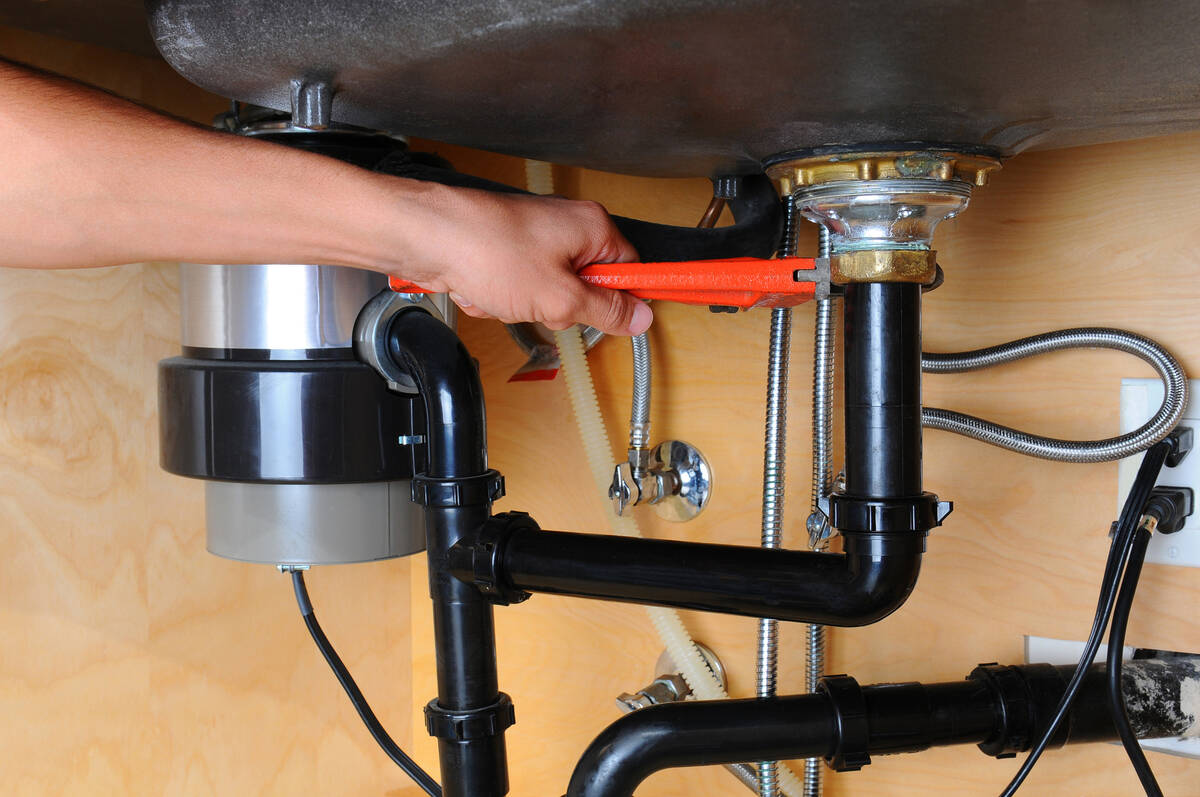
Pair of likely causes to check for leak under sink
Q: I have a leak where the drain line connects to the bottom of the kitchen sink. What can I do?
A: What you don’t want to do is run water down that side of the sink. You probably have a leaky sink strainer or a cracked tailpiece.
The sink strainer is the basket that sits in the bottom of the sink, with slots in it to keep food from running down the drain. The tailpiece is the vertical pipe that runs from the strainer to either the trap or another pipe that leads to the trap.
A new strainer costs less than $10 and takes less than an hour to install. A new tailpiece is less than $5 and will take about 10 minutes to install.
Let’s check the tailpiece first.
Remove the slip nut at the base of the tailpiece; this is usually PVC and will twist off by hand. Next, remove the slip nut at the top of the tailpiece. You’ll need channel locks (also called water pump pliers) or a large open-end wrench to remove this nut.
Take out the tailpiece and inspect it for cracks, especially where it connects to the strainer. If there’s a crack, replace the tailpiece. Cut the new tailpiece to the same length as the old piece using a hacksaw.
If there is no crack and the tailpiece looks good, you’ll need to replace the strainer. The toughest part is loosening the lock nut while keeping the strainer from turning with it. Use a spud wrench, which has a large opening to grab the lock nut, or a large pipe wrench.
To keep the strainer from turning, stick the handles of a pair of pliers into the holes at the bottom of the strainer, then stick a large screwdriver through the pliers’ handle. Once you have removed the lock nut, pull off the washers on the underside of the strainer. The strainer should lift out of the top of the sink.
Now you’re ready to take a putty knife and scrape the old plumber’s putty from the top of the drain hole in the sink.
Apply a new bead of plumber’s putty to the lip of the drain’s opening and push the new strainer into the hole. The putty will squish out around the top of the strainer. From under the sink, place the rubber washer on the strainer, then place the fiber friction washer under it.
Finally, screw on the new lock nut. You’ll probably have to use the trick with the pliers again.
Lastly, replace the tailpiece and tighten down the lock nuts. Use a paper towel to wipe up the putty that squeezed out from under the lip of the new strainer.
Mike Klimek is a licensed contractor and owner of Las Vegas Handyman. Send questions to handymanoflasvegas@msn.com or 4710 W. Dewey Drive, No. 100, Las Vegas, NV 89118. Visit handymanoflasvegas.com.
Do it yourself
Project: Repair leak at sink drain
Cost: Under $15
Time: Under 1 hour
Difficulty: ★★★


